
- Remittance
- Exchange Rate
- Stock
- Events
- EasyCard
- More
- Download
- Creator


A Step-by-Step Guide to Registering, How to Transfer Funds to Wise Using BiyaPay

Published on 2024-06-18 Updated on
2024-11-04


Wise (formerly TransferWise) is a service provider that supports the exchange of over 40 currencies and transfers to more than 80 countries. Compared to traditional banks, Wise is more cost-effective and easier to use. With the Wise international debit card, you can also link it to the BiyaPay multi-asset trading tool, enabling global asset allocation anytime, anywhere.
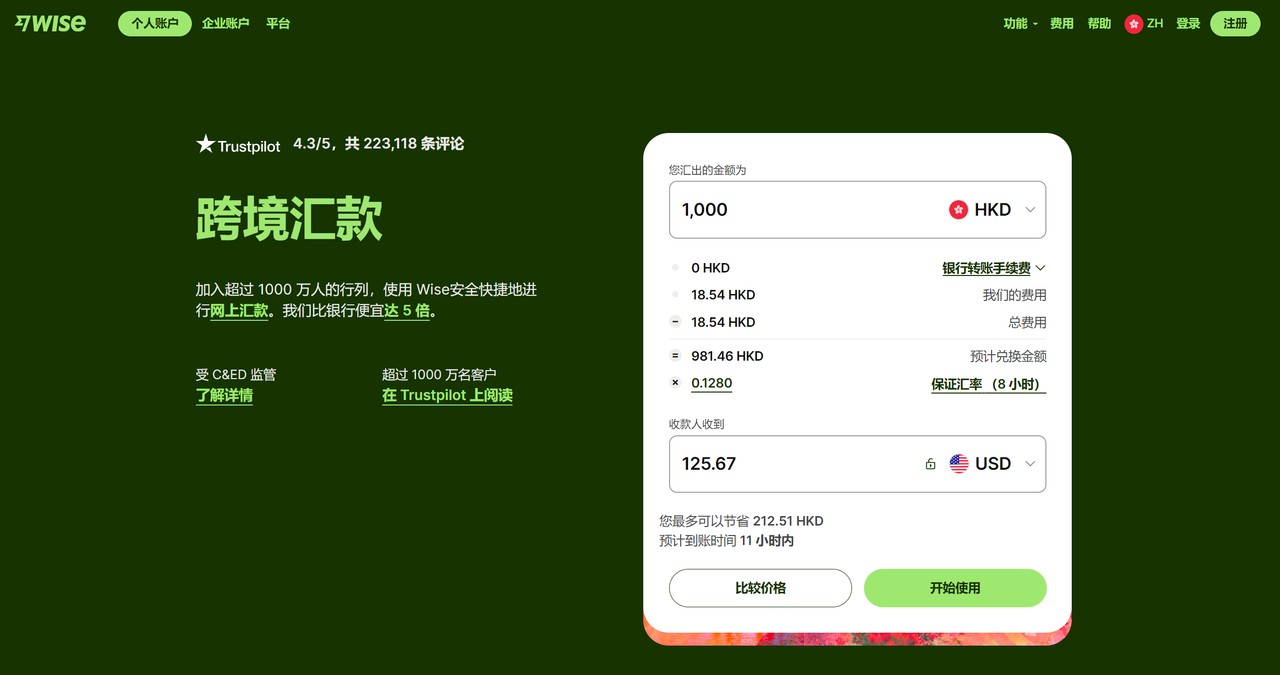
Ready to open a Wise account to pay or hold foreign currencies?
Introduction to Wise
Wise, founded in 2011, is a UK fintech company formerly known as TransferWise. It is an electronic money institution authorized by the Financial Conduct Authority (FCA) in London and is listed on the London Stock Exchange, providing international remittance services to most countries worldwide.
Wise offers services including international remittances, debit cards, and Wise accounts. Chinese merchants and individuals can use Wise for international remittances, currency exchange, etc. Foreign currency can be withdrawn to domestic UnionPay cards and Alipay with very low exchange loss or transferred abroad. Mainland Chinese accounts do not support physical cards.
Uses of Wise
- A low-threshold US bank account for free transfers and payments. It also provides bank accounts in other currencies with no minimum deposit.
- Freedom to exchange and use currencies with quick currency exchange services.
- Receiving payments from Amazon and third-party platforms.
- Obtain a debit card (registration requires a US or non-China phone number, and selecting a non-China region).
- Provides bank statements with customizable billing addresses.
Who is Wise Suitable For?
- Individuals needing flexible receipt and payment options.
- Those needing local virtual bank accounts.
- For overseas shopping.
Wise Account Registration and Required Documents
- Name (must match the passport)
- Date of birth
- Phone number (supports mainland China mobile numbers)
- Personal address
- Valid passport (ID cards are not supported)
How to Open a Wise Account
1. Registration Steps
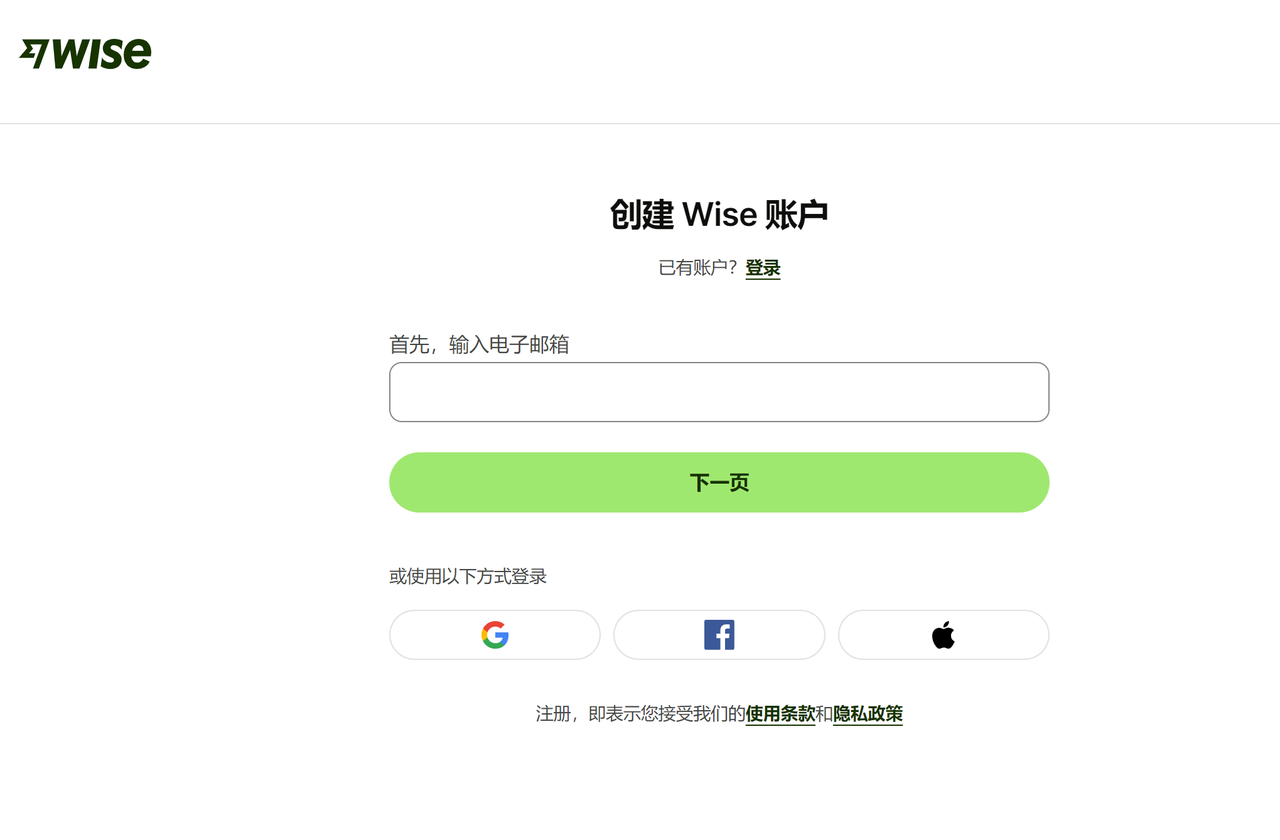
Log in to the Wise website to register online, or download the Wise app (Android users need to download from Google Play). Click “Sign up” and enter your email address. To make it easier, you can also register using your Google, Facebook, or Apple account.
- Enter Email Address
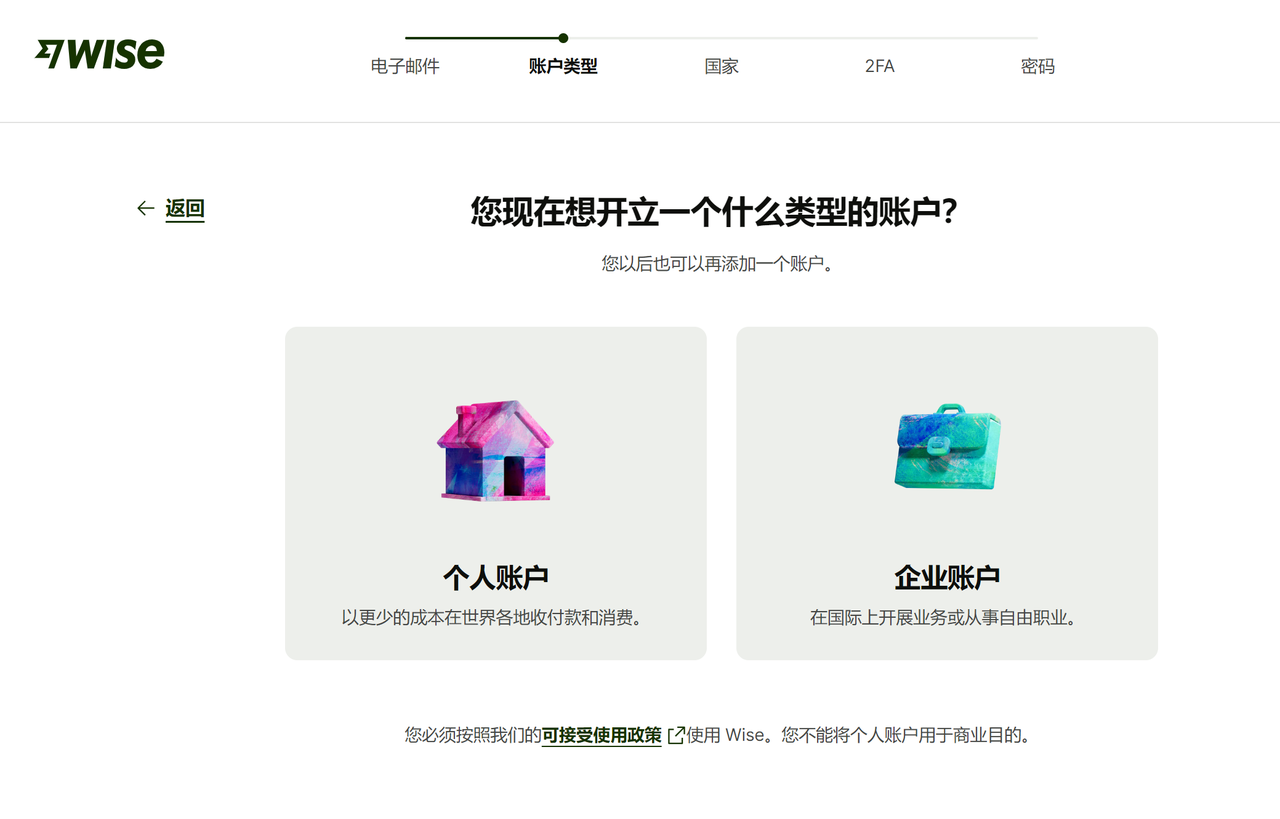
- Choose Account Type
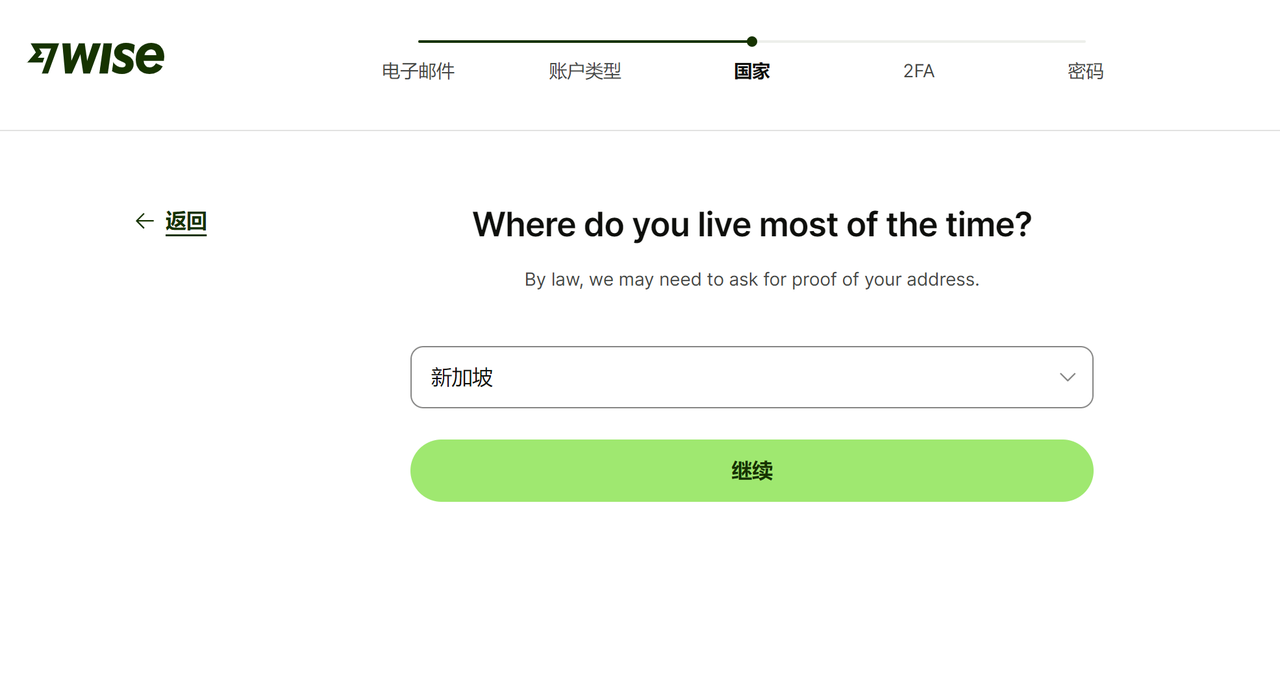
- Select Residence Region
I chose Singapore because I previously registered an OCBC Bank account in Singapore. You can select Singapore here because you might need to provide proof of address later when applying for a physical card. I can submit my OCBC bank statement directly. If you also want to register a Singapore OCBC bank card, you can refer to my previous video on the OCBC Bank account opening process.
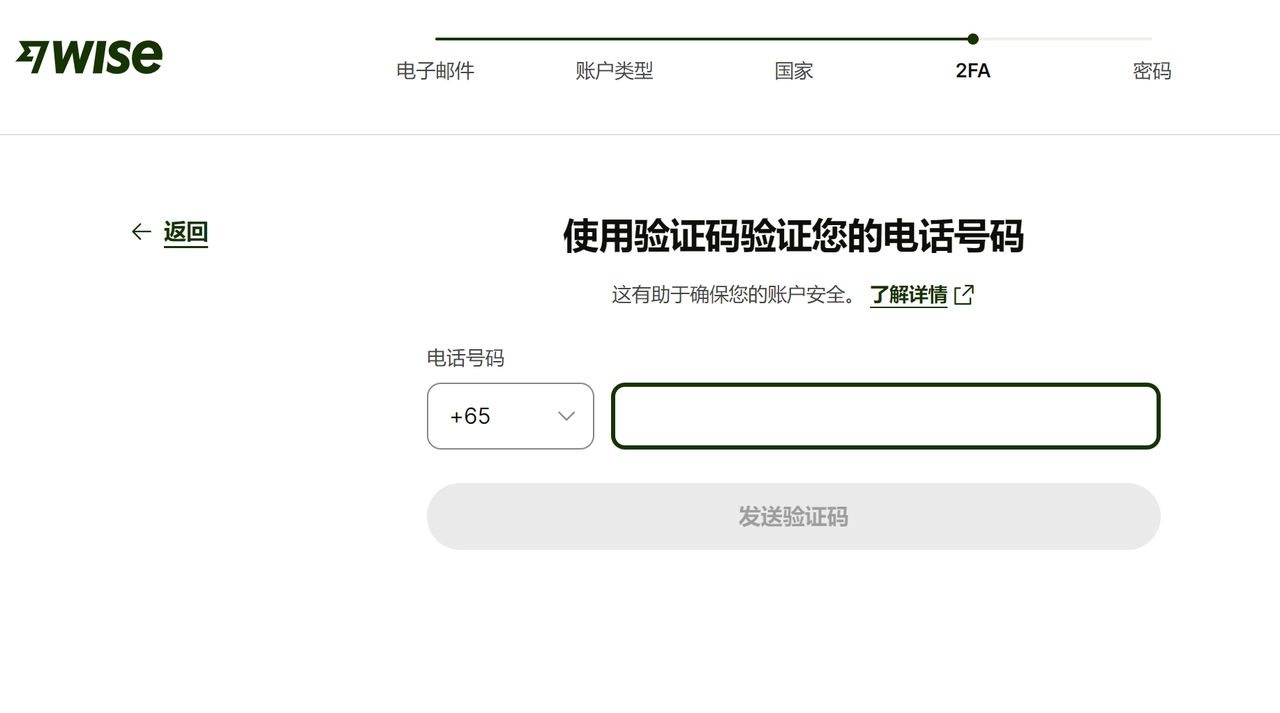
- Enter Phone Number and Complete SMS Verification
- Set Login Password and Complete Account Registration

You will be asked what you want to do now, such as sending money abroad or setting up a new currency account. Click “Decide later” for now.
You will also receive an email to verify your email address. Click “Confirm your email” to verify.
2. Set Up Payment Method
Once your Wise account is verified, you can set up payment by entering the amount you want to send or the amount the recipient should receive online or via the Wise app. You will get an instant quote and estimated arrival time, so you can compare your options and proceed with the payment.
How to Fund and Activate Your Wise Account
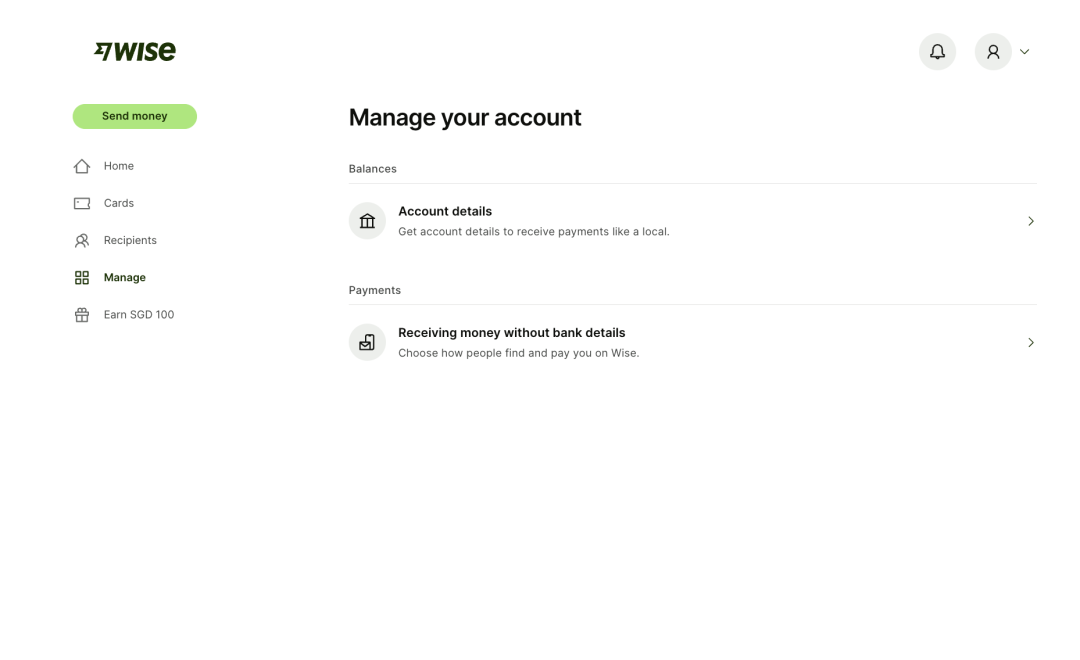
Click on “Settings” to Enter "Manage"
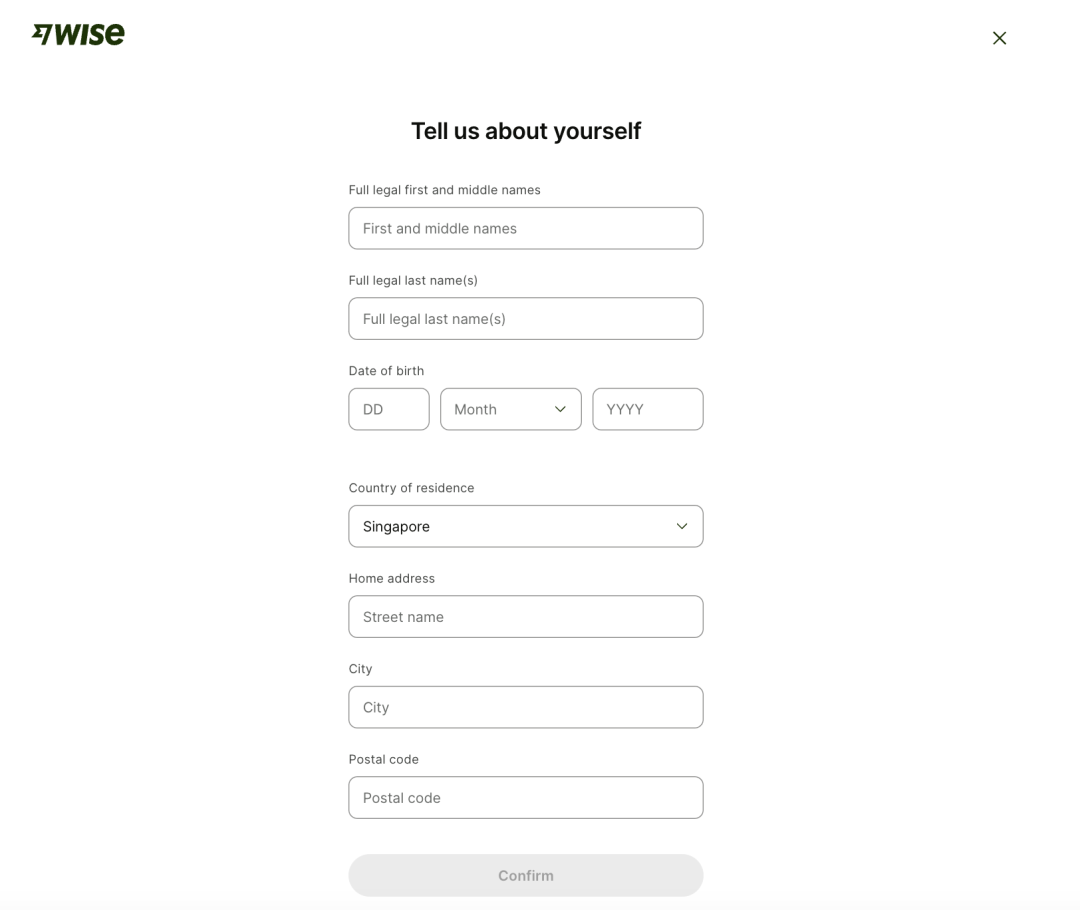
Fill in the Required Information
Important Notes:
1.Your name must match the name on your passport (in Pinyin). Ensure the First name and Last name are not reversed.
2.If selecting Singapore, enter a local residential address (you can find one on Google Maps). To avoid address verification issues, you can initially use the address on your OCBC bank statement and change it later if needed.
3.Upload your passport for verification and wait for the approval.
4.You might be asked to complete a questionnaire. Be honest based on your situation to avoid triggering risk controls requiring additional documentation.
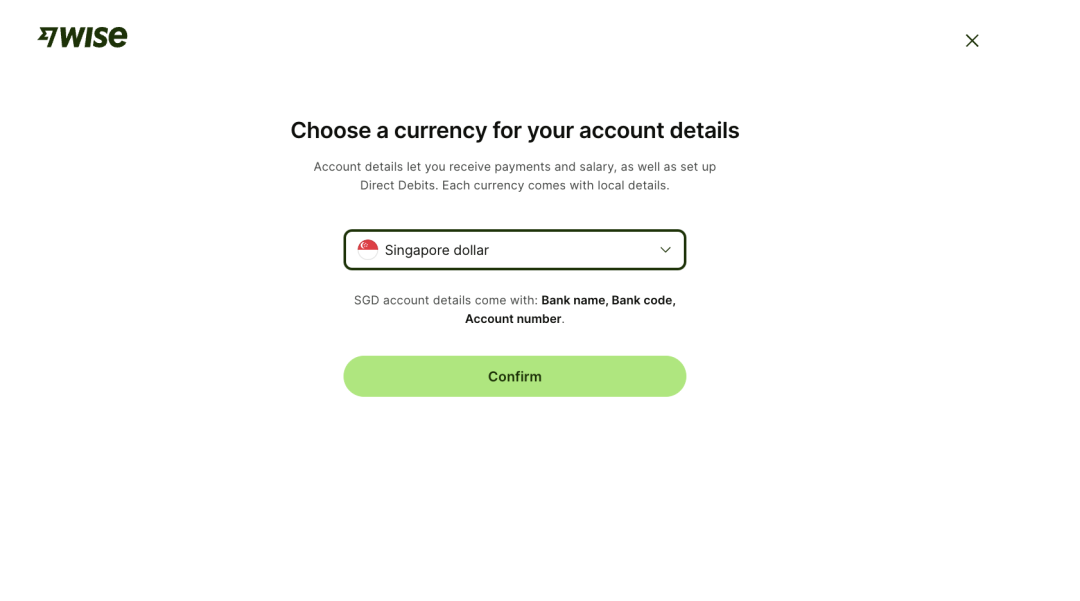
Choose Account
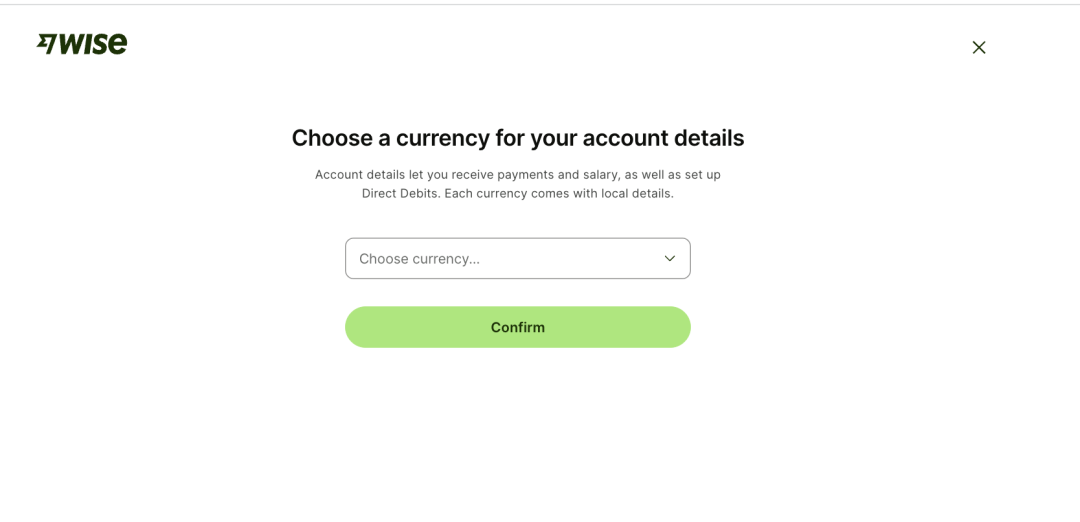
Select Currency Based on Country
Fund Your Account
Click on “Add Money” and enter the amount.
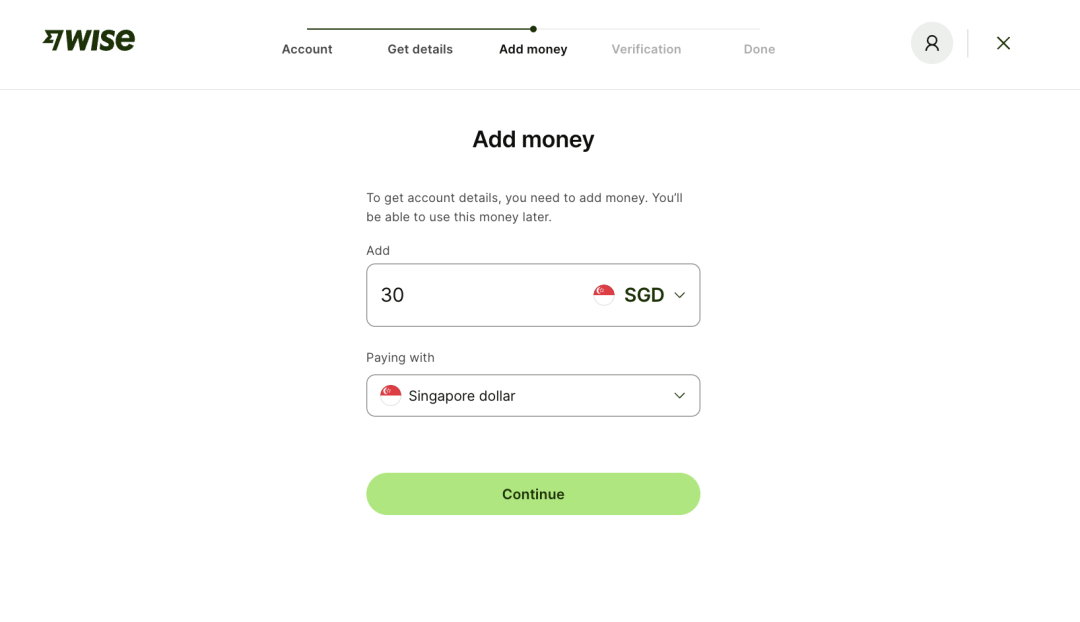
If you have an OCBC account, select PayNow to avoid any fees.
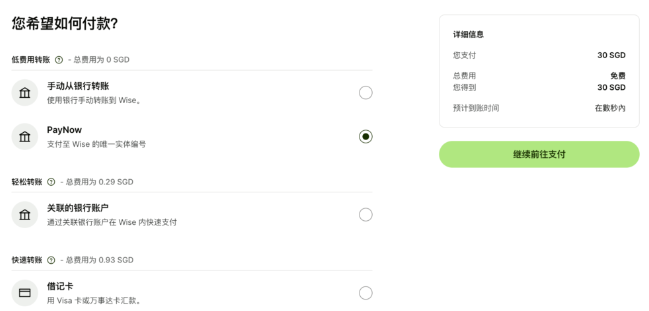
- Open your OCBC app and scan the QR code to make the payment. Once the funds are sent, click “I’ve made my bank transfer” on the Wise page. It may take between 10 minutes to 2 hours to receive the Wise activation confirmation page and email. After successful payment, you can withdraw the balance to your OCBC account without any fees.
Reminder: Wise only supports funding and activation from a bank account in the same name. If you don’t have a bank card or are unsure how to activate, you can seek help from merchants on platforms like Amazon or Taobao.
If you need to send, receive, hold, or exchange international payments, using a Wise account might be your best option. Wise allows you to safely hold over 40 currencies and switch between them. You can also get local account details for up to 10 currencies to receive local payments from over 30 countries.
Wise is convenient for family travel expenses, children’s education, property investment, fund trading, insurance, etc. It allows you to freely manage your funds quickly and easily. For mainstream fiat currency exchanges through digital currencies (USDT, BTC, etc.) and remittances to Wise, consider downloading BiyaPay, a professional global multi-asset wallet tool. It offers low fees, fast transactions, and no thresholds, helping you safely and quickly remit funds to your Wise account.
How to Use BiyaPay to Transfer Funds to Wise
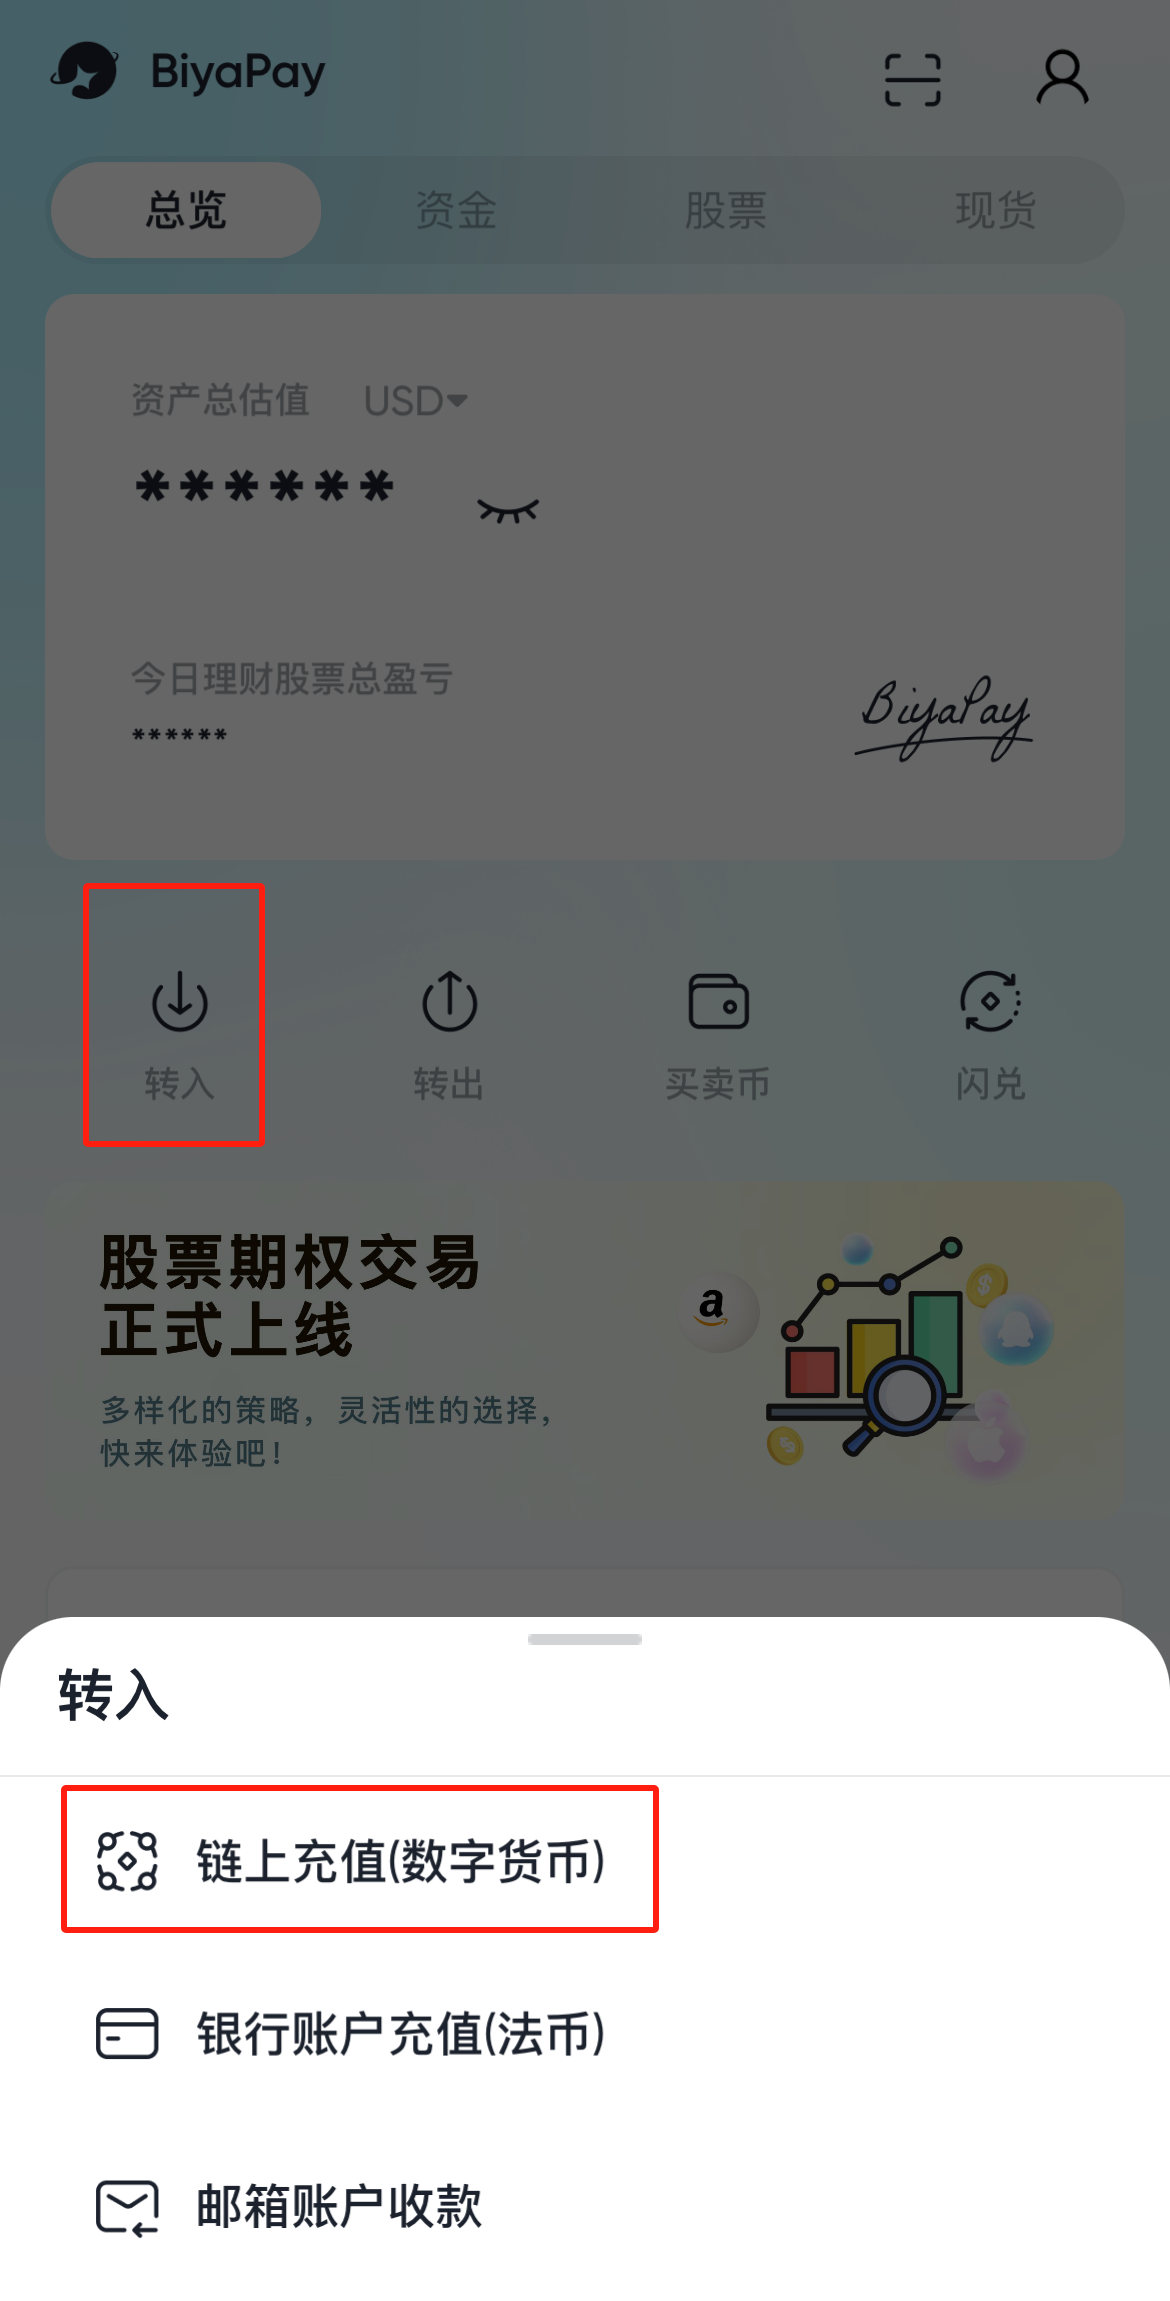
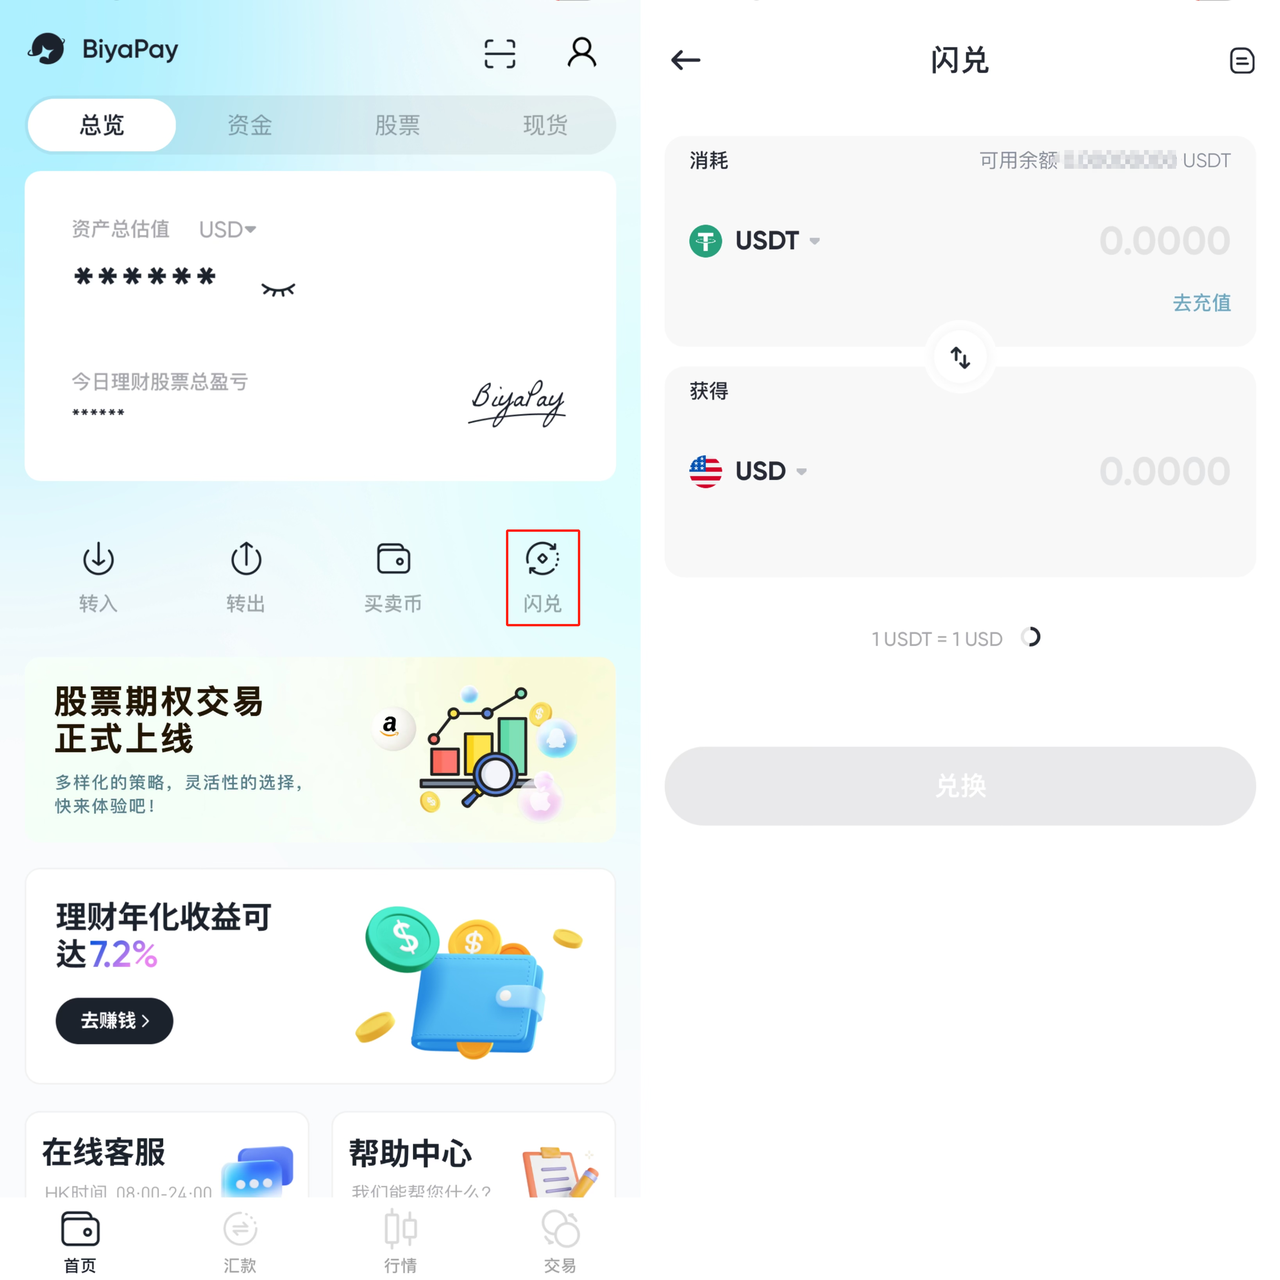
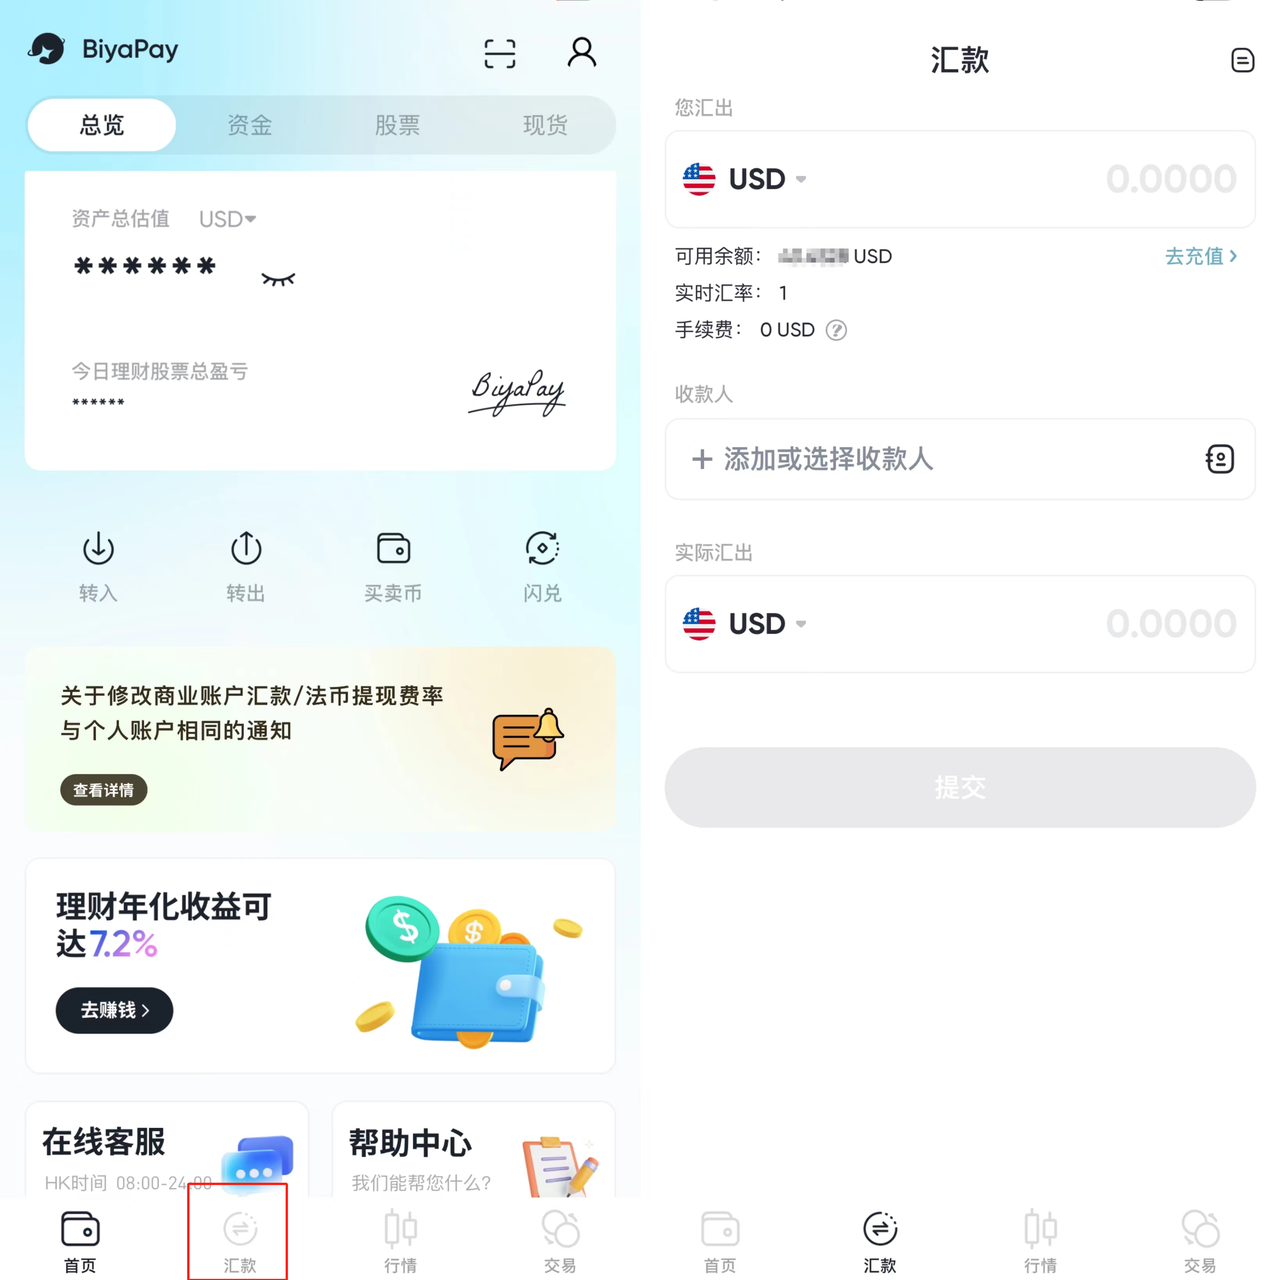
Here is an example using “Recharge USDT to Exchange for USD”:
Click “Register”: Enter your email address to complete the registration.

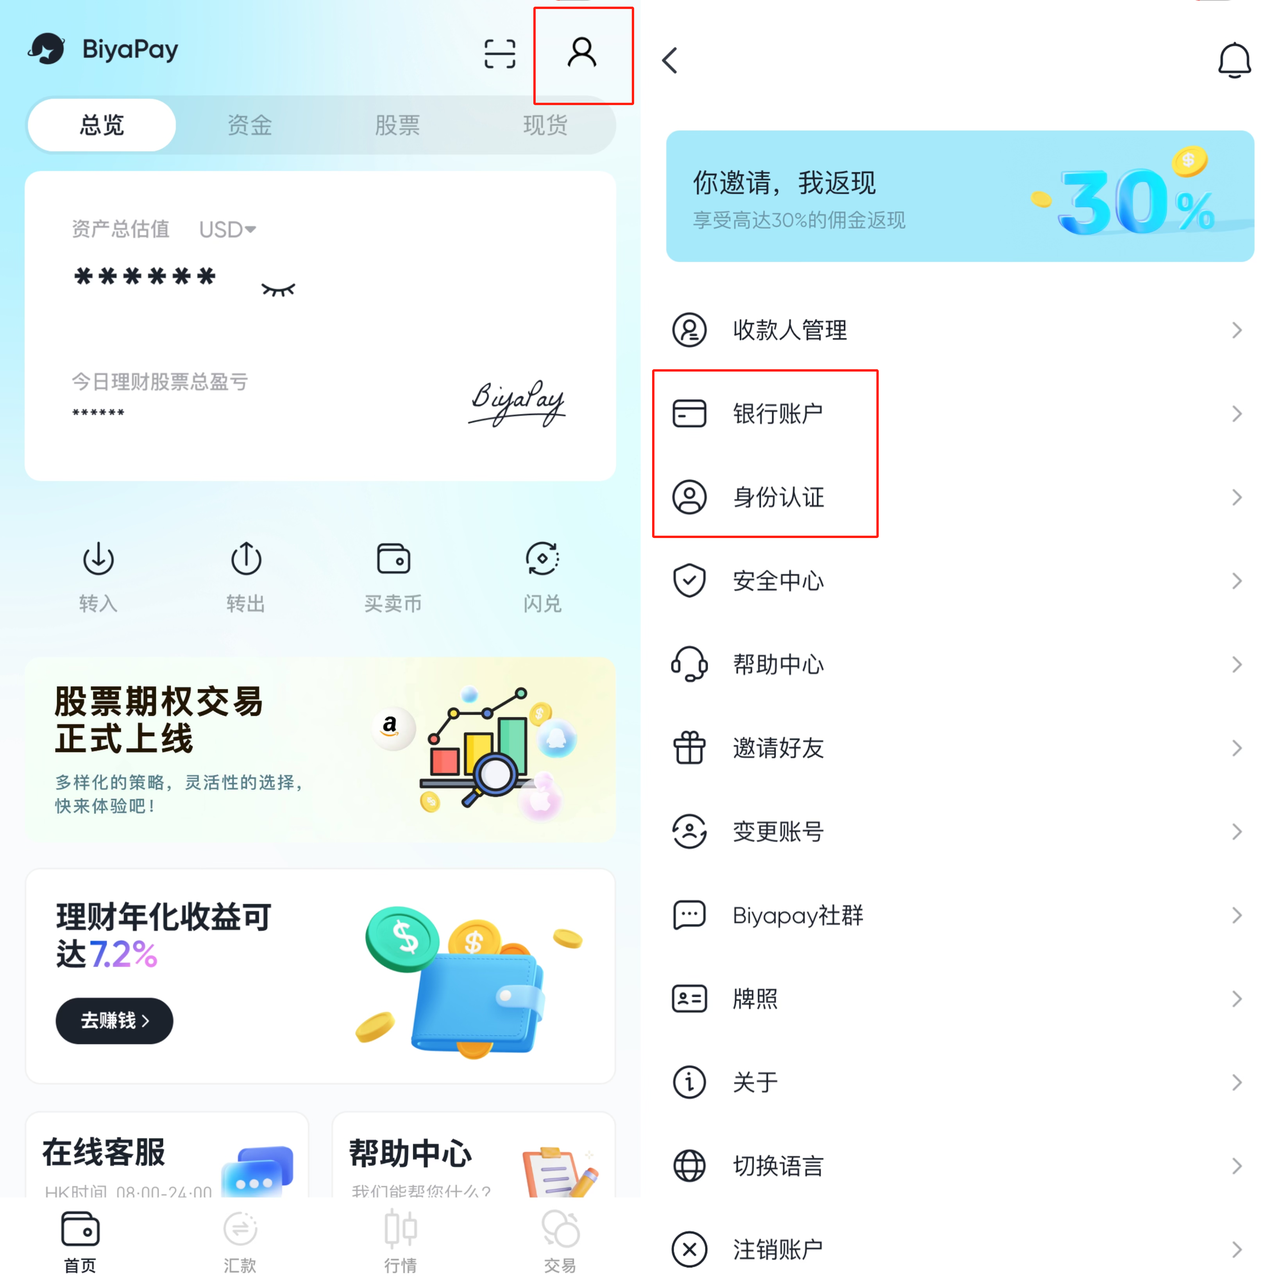
Complete Identity Verification and Add Bank Account
Click “Deposit”: Choose “On-chain Deposit” to recharge digital currency (e.g., USDT).
Select “Instant Exchange”: Enter the instant exchange interface to convert digital
Go to the “Remittance” Page: Choose to remit USD, select the recipient’s account, enter the email verification code or Biya authenticator code, and withdraw to the added Wise account.
The Advantages of BiyaPay
BiyaPay supports the online real-time exchange of over 20 major fiat currencies and more than 200 mainstream digital currencies. This enables local transfers in most countries or regions worldwide, allowing for same-day remittance and same-day receipt.
Additionally, BiyaPay can be used to purchase personal insurance, financial products, or Hong Kong and U.S. stocks. You can recharge digital currencies, exchange them into USD/HKD in BiyaPay, then withdraw to your bank account and deposit into a brokerage account. The transfer speed is fast, with no limits, removing any concerns about deposits and withdrawals. You can also directly exchange digital currencies into USD/HKD for real-time transactions in BiyaPay, saving both time and fees.
Conclusion
That concludes everything I wanted to share. If you’re interested in these two cross-border remittance tools, you can visit their official websites to learn more!

BiyaPay makes crypto more popular!
Contact Us
About
Product
Support
Service
Rate calculator
Telegram:
https://t.me/biyapay001
BiyaPay APP
Telegram community:
https://t.me/biyapay_ch
Telegram digital currency community:
https://t.me/BiyaPay666
Community


Sign In
Sign Up
Sign In
Sign Up
Regulation Subject
BIYA GLOBAL LIMITED registered as Financial Service Provider (FSP number: FSP1007221) in New Zealand, and is a member of the Financial Dispute Resolution Scheme, a New Zealand independent dispute resolution service provider.
BIYA GLOBAL LLC registered with the US Financial Crimes Enforcement Network (FinCEN), as a Money Services Business (MSB), registration number: 31000274115551, and regulated by FinCEN.
BIYA GLOBAL LLC To enhance investor protection, BIYA GLOBAL LLC is expediting its Broker-Dealer license application process in full compliance with U.S. SEC and relevant regulatory requirements.
©2019 - 2025 BIYA GLOBAL LIMITED
Terms of service Privacy Policy